The Ultimate Guide on How to Use Cricut Maker with Bonus Tips
Finally, the Cricut Maker arrived. So now what?

Before you have bought it, you probably had a bunch of ideas on what you can use it for. Then the reality sunk in. How do you get started with this machine? What’s the first step? These questions usually lead to procrastination.
Don’t let it beat you!
This is why I’ve created this How to Use Cricut Maker guide. By reading this article, you will get started on the right foot. Have you lost that drive after you made the purchase? I hope by finishing this guide, you will get it back.
How Other Industries Get You Hooked
Let me tell you how a different industry gets people addicted to their products. It’s not what you think. I’m talking about the gaming industry. Most games are harder nowadays than they were a couple of years ago. Plus people don’t have the same attention span.
At the first signs of difficulties, players quit and ask for a refund. So how did the gaming industry respond to that? By creating early wins.
This concept of early wins came to me from Tim Ferriss. You know the 4-hour guy. No matter what you want to achieve, you can do it in four hours. He mentions keeping your drive you need to set yourself up for a few early wins.
This will train your mind to keep at it. You have gotten used to the high from achieving minor victories, so it will make it easier to tackle bigger problems.
Come to think of it if you are faced with a seemingly hard task from the get-go you are most likely to give up than being faced with a few easier tasks and then presented with a challenging one.
This is why I’ve created this How to Use Cricut Maker guide. So you can get those early but crucial wins. After you get used to winning, it will be much easier to face adversities.
How to Get Started with the Cricut Maker cutting machine
So let’s get started. I know creating a project from start to finish with the Cricut Maker is daunting. This is why I’ve broken that task into small, easy to digest pieces.
The first thing you need to do is unbox your Cricut machine and find a place for it. Since the Cricut needs a specific space, choose it wisely. I have a dedicated spot for it, so I don’t have to move it from one room to the other continually.
Remove all packaging and wrapping material and turn it on.
Don’t forget to plug it in. Yeay here’s our first win.
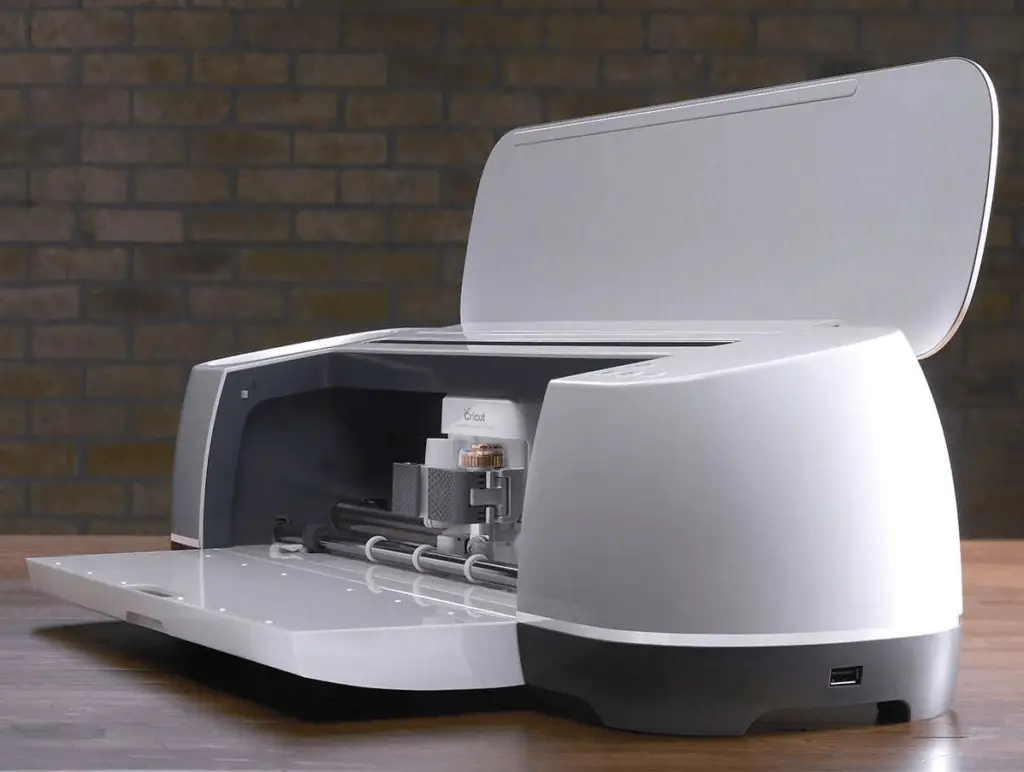
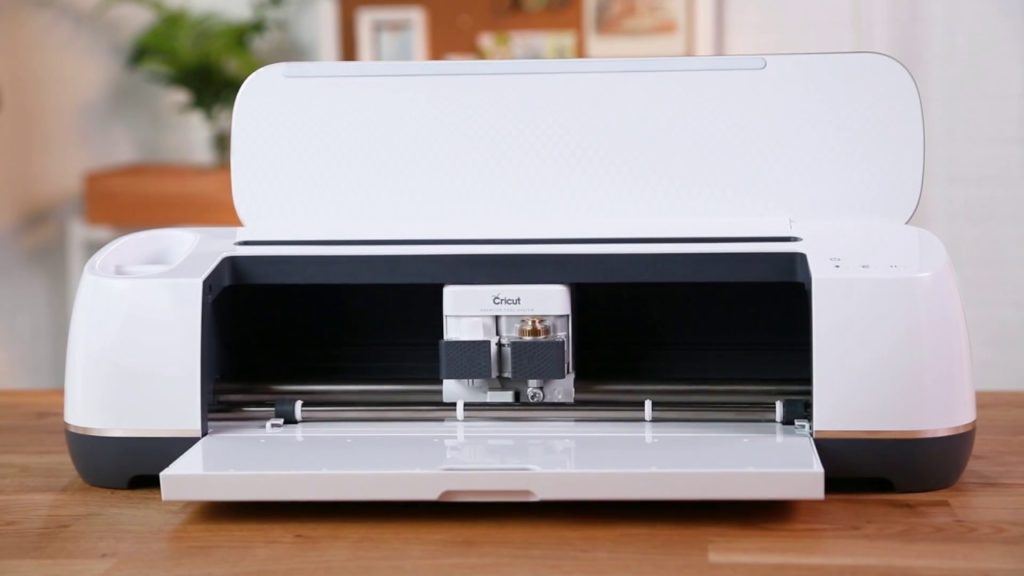
I don’t know what’s about Cricut, but I love their design. They seem to be the Apple of the vinyl cutting world. Other machines have sharp edges and bulky design. Cricut is different. It has nice curves, and the colors are exceptional.
I personally love how the doors open on the Cricut Maker. That slow-motion effect always gets me. And it’s not just me. I’ve found my kids playing with the door whenever they can get their hands on it. This movement takes their breath away.
Internet Connection and Software Updates
The next important step is to connect to the internet. And it’s a good idea to set up a wireless connection with your device. Cricut has the option to connect with your device with cords and without it.
I prefer the Bluetooth option because you never know when you can tangle those cords.
Once you connect your Cricut to the internet, there’s a firmware update needed. Since Bluetooth is slow, I recommend using the cord instead. If you want to stick with the wireless option, it takes around 10-15 minutes to finish the update.
Yeay another win. Your Cricut machine is operational. The next step is to pair it with your device. The beauty of Cricut lies in the software. You can use it on any device. Plus you don’t need to update either constantly.
The software engineers are doing it in the background. The Cricut’s software is called Cricut Design Space. And it’s a web-based program. This is why you don’t need to worry about being up to date.
After you have registered your account and your device, it’s time to get started.
Have you seen the Cricut Explore Air 2? The main difference between Explore and the Maker is that the later one is only controlled through software. You don’t have a dial to turn. All you have to do is select the right material from the program.
Not long ago, I’ve created a comparison of these two machines. And you can read my Cricut Explore Air 2 vs Cricut Maker over here. If you are interested in just the Explore 2 take a look at the Cricut Explore Air 2 review.
I’ve got a bit sidetracked. Let’s continue with our How to Use the Cricut Maker guide.
Choose the Right Material to Cut
Here’s a deal circuit maker is a fantastic machine. You can do so many things, and it supports over 100+ materials. That’s not a small thing. Since it has such a significant cutting power, you can work with harder materials as well like balsa wood and chipboard.
Read our related article, How to Cut Chipboard With Cricut Maker for a more comprehensive guide!
With all these possibilities there’s a significant drawback as well. Exposed to so many options, people will lose focus and start doing everything at once. Sooner or later, they get bored and stop using the machine.
Here’s a simple solution for it. Pick one material and master it. After you have learned everything, there’s to do with it then and only then jump on the next one.
I know it’s tempting to cut vinyl and paper and after that check out the fabric cutting. We shouldn’t leave out some paper scoring while you’re at it.
This isn’t the right way to do it. Let’s keep to the original plan and let’s get some early wins in this department as well. So pick a simple project. Let’s say it’s paper or vinyl or whatever you like. And start playing with Cricut Design Space.
Learning to Use Cricut Design Space
Wait, I have to tell you something important about Design Space. It’s the easiest to learn vinyl software on the market today. I don’t know how they have pulled it off, but it’s so intuitive and straightforward that you can’t get lost.
Since the learning curve is small, you can crank out projects with ease. Let’s keep it simple. Select a shape or write some text and let’s get this Cricut humming.
You have chosen, the design and the material you are working with, let’s get to the cutting phase. Before we start the cutting process, we need to do certain things.
Choose the right tool for the job. If you are drawing, then you need to insert the pen tool and if you are cutting you need to add the cutting blade.
As you can see, Cricut Maker supports dual carriage. This means that you can do two steps at a time. You can draw and cut. If you have inserted the right tool, we are heading towards the software.
Here we need to select the right settings. Once that’s done, the next step is to insert the mat. Cricut has a number of different mats for different purposes. For example, the stickiest mat is for fabrics, and I personally rarely use it. For beginners, I recommend to start with either paper or vinyl.
Setting up Your First Cut
Remove the mat cover and keep it nearby because after you have finished the job, it’s a good idea to cover it. If you don’t, it will gather dust and gunk, and it will lose its stickiness extremely fast. But don’t worry, I got you covered.
If you notice that the mat is not that sticky anymore, you have two solutions. You can clean it and see if it regains its stickiness, if not then you can use an adhesive spray. Now my recommendation is to use the adhesive spray after every 4-5 times as for you have washed it.
This will significantly cut down on your expenses. By not ordering mats every other month, you are left with more profits.
So you have your sticky mat ready now add the material you are working with. Let’s say you are working with vinyl. Add the vinyl on the mat and use the Cricut squeegee tool to push out the air bubbles. This is important because if you don’t, it might ruin your design.
Load the mat into the machine. There are blinking buttons which will help you guide you through the process. Simplicity and easiness are present all the way.
Read More: How to Clean Cricut Machine. Learn the ins and outs of cleaning your Cricut to keep it working like new!
Making the First Cut
Once this is done you hit the start button. What I’ve forgotten to mention is that Cricut Maker supports 2x speed. Specific designs can be done in half the time. This is available for simple shapes. If you have an intricate design, it’s better to stick with average speed.
Here’s a small warning. Usually, the Cricut is a quiet machine, but if you crank it up to 2x speed, you will sacrifice it. This shouldn’t be a problem if you are working during the day. The noise is not that bad either.
Before the Cricut actually starts the job it checks if you have loaded the right tool in the slot. Isn’t it smart?
Of you are using a cutting blade, make sure you set the depth to the required one.
Now you can sit back and let Cricut Maker do its job. I remember that very first time I set the machine up for a job I was holding my breath while I watched it work.
Read More: How to Slice Letters in Cricut Design Space. Learn how to slice text in our easy-to-follow guide!
How to Weed Efficiently
Once the job is finished unload the mat and remove the vinyl. Here comes the tedious part of the whole gig. You need to weed out the excess material.
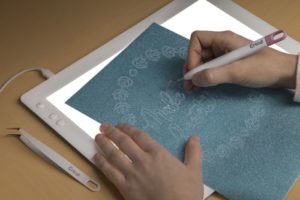
The circuit has many useful tools. Plus there’s’ the Cricut Brightpad that helps you with the weeding process.
You know sometimes you can’t see the fine lines, so if you shine some light under it, you can easily distinguish what you need to remove.
Once that’s done you are ready to stick your vinyl on the surface you want to. Remember to push out air bubbles at this step as well
This covers every step you need to take on how to use the Cricut Maker.
I’m not done yet. Since its Cricut, they have created a few accessories that will help you get the job done.
Read More: Can You Cut Multiple Colors On Cricut? Learn how to cut multiple colors the RIGHT way here!
Thoughts on Cricut Accessories

One of these accessories is called Cricut Easy Press. This is an iron that helps you apply heat transfer objects. This is an excellent tool to use if you want to personalize t-shirts and clothing.
If you want to know more about the Cricut Easy Press, check out my recent review.
You know it was always a nightmares cut fabric with machines. Circuit solved this problem with elegance by creating the rotary blade. Guess what? It cuts the fabric perfectly. There are no errors or strands. For intricate designs, it’s faster and cleaner than using scissors.
You need to buy the rotary blade separately.
Here’s a helpful tip. Let’s say you are mainly working with vinyl and paper. It’s a good idea to use different blades for the job. The paper is the issue here; it makes the blades dull faster. This is why I suggest using a distinct blade for paper and vinyl so you will always have a sharp blade to work with.
After you have got the ropes with the machine, you can experiment.
You probably think that this is all nice and fancy, but how do I make money out of it? Also, it would be nice to recover the investment price as soon as possible.
Don’t worry; I got your back. I’ve written a unique guide on how to make money with vinyl and decals. And you can read it here.
It’s the easiest and most profitable niche to get into. The best part is the expenses are minimal. If you don’t want to do the job, you can easily outsource it as well.
Read More: Can I Use Scoring Stylus With Cricut Explore Air 2? Here’s how to use a stylus with the Explore Air!
Closing Thoughts using the Cricut Maker Cutting Machine
We’ve reached the end of this how to use the Cricut Maker guide. If you want to read my full Cricut Maker Review then click here.
I hope you have learned a ton and you understand how important it is to have those early wins.
Let’s recap what we have learned, and after that, you can dive into the deep end of the pool.
Here are your action steps:
- Unbox the machine
- Connect to the internet and update the firmware
- Connect Cricut maker to the device you will be using
- Register on design space
- Play around and learn how to use design space
- Load the mat into the maker
- Create the design and execute the job
- Remove the mat
- Weed out the excess material
- Apply it to the desired surface.
That’s about it. How did you like this guide? What’s your sticking point? Comment below. If a sticking point becomes all too common, I will cover it in my next article.
Happy Crafting!
Frequent questions from our readers (FAQ):
What can I do with a Cricut Maker?
Cricut Maker is one of the most versatile machines on the market today. It has 4000g cutting power so you can access over 100+ different materials. With it’s power you are not limited to vinyl and paper. A whole new world opens up. With the knife blade you will be able to cut balsa wood and chip wood with ease. Besides these you can create T-shirt designs, decals, stickers, and actual fabric items.
What do I need to start using my Cricut maker?
You will need a device to control the maker. As long as it has internet connectivity any device will do. Besides this you need materials to work with. A bit of patience to go through the learning curve.
How do you make a project on Cricut maker first?
All you have to do is login to the Cricut Design Studio and create a new project. If you are stuck do check out the tutorial it’s straight to the point and easy to get started.
How long does it take to set up Cricut maker?
It’s hard to estimate in minutes. You need to unbox it and remove all the stickers. Then you need to connect the maker to a device and do a firmware update. If you are updating through wireless then it will take more time then with a USB cord. Usually this update doesn’t last longer than 15 minutes. After that you are ready to go.
Which is the new cricut cutting machine?
The new cricut cutting machine is the Cricut Maker. Also they have released the new Cricut Joy as well.
Is the rotary blade included with the new cricut maker?
The rotary blade is not included with the new cricut maker. You have to buy it separately.
Can I use the rotary blade with the cricut explore air 2?
It’s not compatible with the cricut explore air 2 or other cricut machines besides the cricut maker cutting machine.
Can I upload svg files into cricut design space?
Yes you can upload svg files into cricut design space and other common images as well. The best thing about cricut design space is that it’s platform independent because it’s web based.
How durable is the cricut cutting mat?
The cricut cutting mat is long lasting. In case it gets filled with dirt and debries you can clean it and I have a post about it. Plus you can even restick it. Make sure you keep a cricut cutting mat as a reserve just in case.
What should be the first project with the cricut maker or cricut explore air?
I highly recommend doing the demo as the first project. If you get an early win with your first project it’s more likely that you go on creating.
What can you make with the cricut maker?
If you want to make vinyl paper and many other projects than the cricut family is ideal for it. They support over 100+ materials like paper, vinyl, card stock, chipboard etc.