Whether you’re making shirts for your business or for yourself, you’ll need to know how to work a Cricut.
Specifically, you’re going to need to know how to get your Cricut to put graphic designs on a shirt.
Thankfully, we have done the research and the testing to figure out how, exactly, to do just that so you can just follow our guide and get right to creating.
Supplies Needed
Before we begin, let’s go over everything we are going to need to get this project done:
- Cricut machine, Explore Air 2, or Joy (these models are all rated for cutting vinyl)
- Iron-on vinyl (or any iron-on material)
- Cricut Design Space app
- Shirt
- Material trimmer
- Wedding tool (an optional tool to help with weeding)
- Cricut EasyPress or regular iron
- EasyPress Mat or a towel
Read More: Cricut Joy Review. Here’s what we think about the Cricut Joy!
Choose Your Design

This can be done one of two ways:
- You can create your own design from scratch
- Or you can find someone else’s design
For the purpose of this guide, we will be covering both methods.
Create Your Own Design
To create your own design, you are going to need the Cricut Design Space app.
It is a free app that you can download on your computer, laptop, or mobile device.
- In the app, select ‘New Project’ on the home page.
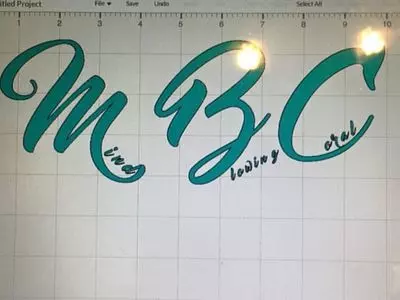
- Then, select ‘Text’ on the left-hand navigation bar of the canvas, and pick whichever font you wish to use.
You can also mess with the font size, style, and alignment, and even add a curve to the text.
- Next, type out your text.
You can cut out any whitespace, such as the whitespace inside the letters, by clicking on the whitespace and then clicking on ‘Save As A Cut Image’.
If you like the way it looks, then you are ready to move on to the next step.
Otherwise, keep messing with your text until you do like it.
Upload A Design

To use someone else’s design, you are first going to need to find the design you wish to use.
You can do so by simply searching the internet for designs.
- When you find one that you wish to use, go ahead and right-click on it, then select ‘Save Image As’.
But, first, make sure it is in an SVG format. If it is, then choose where you want to save it.
- Now, go into the Cricut Design Space app.
- Click ‘Upload’ on the left-hand navigation bar.
- Click ‘Upload Image’, and select the SVG file you just downloaded.
The SVG file will now be uploaded to the app, and you can go ahead and select the uploaded image and click ‘Insert Images’.
- If the design is in multiple layers, then click ‘Weld’ in the bottom right-hand corner to merge the layers into one.
- Remove any whitespace by clicking on the whitespace then click on ‘Save As A Cut Image’. This can include any whitespace inside each letter.
Let’s move on to the next steps.
Templates

Whether you created your own design or uploaded someone else’s, you are going to want to use Cricut templates.
In this case, it is a template of a shirt so you can see exactly how your design is going to look on your shirt.
That way you can make any changes if you need to before printing.
- To find the shirt template, click on ‘Templates’ in the left-hand navigation bar.
This will bring up a variety of different styles of shirts that you can search through until you find the style that matches your shirt.
If you are having trouble finding your shirt style, you can always use the navigation in the top right-hand corner to search for it.
- Once you find your style, select it. You can change its size and color to match your shirt exactly.
Or, if you want to be exact with your sizing, then you can always input your shirt’s measurements.
- Simply select the ‘Custom’ option under the ‘Size’ menu on the top bar.
Now, you can resize your design if you desire. To do so, select the design and drag it by the corners until it’s the size you want it to be.
However, depending on your model of Cricut, you might be limited to a design size of 11.5”x11.5”. So, keep that in mind while resizing your design.
And we also recommend not making your design too wide as this could cause the letters to spill into your armpits, and that’s not very flattering.
Once you have your design sized, colored, and perfect, then you are ready to continue.
Watch this video on how to create a personalized T-Shirt with lettering using a Cricut Explore:
Make It
Now, it’s time to print your design.
- To do so, start by clicking ‘Make It’ in the very top right-hand corner.
- The app will prompt you to connect your computer to your Cricut. Once you do that, you just need to follow the on-screen steps.
The most important thing here is to make sure that the ‘mirror’ option is selected.
Otherwise, your design will be backward when you iron it on.
No matter how much we tried to pull it off as a style choice, it was just embarrassing.
With the ‘mirror’ option selected, just follow the prompts until the Cricut prints the design.
Obviously, you will need material to print out your design.
We recommend using iron-on vinyl, but you can use any material that Cricut recommends.
Cutting & Weeding
Now, place the iron-on vinyl (or whatever iron-on material you use) on the Cricut’s tack mat, making sure that the shiny side is face-down.
- Use the scraper tool to smooth out any bubbles that form between the mat and the material.
- Then, attach the blade to the Cricut, and load your printed material into the Cricut by hitting the arrow button.
Be sure to set your Cricut to the appropriate material. For example, we used iron-on vinyl, so we set our machine to ‘Iron-On’.
- Select the logo button, and the Cricut will do all the cutting for you. It’s truly a magical technology that’s lots of fun to watch.
Once the Cricut is done cutting, it is time for you to perform the weeding, or the process of removing any excess material from around the letters.
Weeding
To do this, start by unloading the material from your Cricut and placing it back on the tack mat.
Pull up your design image again on the app to make sure you only remove what you need to.
This is where we recommend using the material trimmer or a weeding tool.
Cut out the excess, or negative, pieces.
This may take some time depending on the accuracy of your Cricut, but we find this process to be relaxing.
So, learn to enjoy the weeding.
Iron It On
It’s now time to iron the letters onto your shirt.
For this part, we recommend using Cricut Easy Press.
However, we understand everyone might not have this product, so some of you might be using a regular iron.
Therefore, we’ll provide instructions for both methods.
But before we get into that, just note that it is recommended, though not mandatory, to prewash your shirt without fabric softener to get the best results.
EasyPress
It doesn’t matter whether you’re using the first model or the EasyPress 2, these instructions will be the same.
- To start, set the temperature of your EasyPress.
Cricut has a list of recommended temperatures based on the material of the iron-on product and the material of the shirt.
Be sure to follow Cricut’s Heat Guide to determine which temperature to set your EasyPress at, and how long you need to press on the materials to get the best results.
- We also recommend placing your shirt on top of the EasyPress Mat or a towel so that the EasyPress can press the heat deeper into your shirt.
- Once your EasyPress is preheated, press it onto the area of the shirt where you will be placing the design for 15 seconds.
This will remove any wrinkles.
- Now, using your hands, press the material onto the shirt in the spot where you want to iron it on. This will remove any air bubbles.
- Next, press your EasyPress against the material for the recommended amount of time.
If your EasyPress is smaller than the design, then break it up into ironing on two sides.
Try not to overlap the ironing as some materials are too delicate for that much heat.
- Once you are done ironing on the front side, flip the shirt over and press on the back for the same amount of time to ensure the material is fully ironed on.
Once the material has cooled off enough but is still warm to the touch, go ahead and peel off the plastic layer.
Regular Iron
The secret to using a regular iron is to place a towel under your shirt.
Just like with the EasyPress, this allows the iron to press its heat deeper into the shirt and set the material quicker.
Go ahead and preheat your iron.
Odds are your iron does not come with a temperature setting, so you will have to work with whatever temperature your iron sets at.
If your iron does come with a temperature setting, then set it to the max temperature.
- Press the iron onto the area of the shirt where you will be placing the design for 15 seconds. This will remove any wrinkles.
- Now, press the design onto the shirt in the spot where you want to iron it to remove any air bubbles.
And, cover the design with parchment paper to prevent any burning from happening.
We are going to break up the ironing into 4 parts.
This will ensure the material is most effectively ironed on:
- Press the iron vertically on the left side of the design for 30 seconds. Press it vertically on the right side of the design for 30 seconds.
- Press the iron horizontally for 30 seconds on the top half of the design. Press it horizontally for 30 seconds on the bottom half of the design.
- Flip the shirt over, place the parchment over the area you’re going to be ironing, and iron the back of the shirt using the first 2 methods for 15 seconds each.
- Once the material has cooled off enough but is still warm to the touch, go ahead and peel off the plastic layer.
Read More: Heat Press VS Iron. Do you really need a heat press? See if your regular iron could be best for your DIY projects!
Final Notes
With that, you’re all done! Your shirt is ready to wear or sell.
Just be sure to wait at least 24 hours before washing and drying your shirt.
We recommend washing and drying your shirt at the lowest possible temperature as this ensures longevity for both the design and the shirt.
It should also be noted that Cricut recommends drying the shirt inside out to keep the design from coming off.
Finally, even if you used a white shirt, do not ever use bleach while washing this shirt!
