Did you know that you can remove Cricut vinyl from just about anything? Not that it will all come off easily or cleanly, but with some work and know-how you can get it off.
We’ll cover how to remove Cricut Vinyl from fabric, glass, your car, a wall, wood, chalkboard, metal, and more!
Read on to see how to get that HTV off so you can reuse stuff with new HTV designs!
How to Remove Cricut Vinyl
In most cases, you can use tweezers to begin peeling away the design from one edge.
Work carefully to remove the vinyl from the object then use a solvent like denatured alcohol to clean away sticky residue.
To get HTV off of tee shirts and other fabrics, use an HTV remover like VLR by Albachem to dissolve the HTV bonds from the fabric.
Wipe away the vinyl and prep the shirt for a new decal!
How to Remove Cricut Vinyl From Fabric
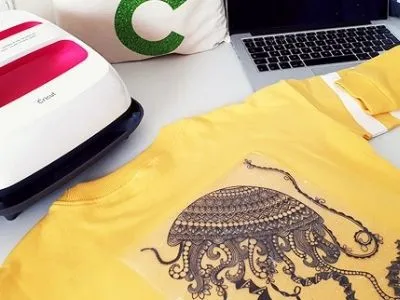
If you need to remove vinyl from any fabric project you can do so safely and reliably with an HTV dissolved.
It’s called VLR by Albachem and you can get it here.
- Spray the solution on the front of the vinyl you want to remove.
- Stretch the fabric a little to work it in and let it sit until the vinyl begins to bubble up.
- Simply wipe the HTV away with a clean cloth.
Once dry the fabric will be ready to use again!
If you’re making shirts to sell, you can’t afford to dump one because the design is crooked.
This remover lets you keep your supplies and redo!
Since we can’t guarantee it will work on any and all fabrics (we tested it on cotton knit) we recommend that you test it in an inconspicuous place first to make sure it doesn’t ruin your fabric.
Read More: How Much to Charge for Vinyl Shirts. We take the cost of materials and labor into consideration!
How to Remove Cricut Vinyl From Glass, Metal, or Ceramic

Removing HTV from other surfaces isn’t quite as easy.
You can use an adhesive remover like this one, but it’s pretty expensive and you still have to pull the vinyl off the surface of the item.
Here’s how you go about removing HTV decals from glass, ceramics, metal, and acrylic items.
What You’ll Need:
- Fine-tip stainless steel tweezers
- A clean rag or washcloth
- Denatured alcohol – this is a solvent to remove the gunk and glue
If you aren’t comfortable using denatured alcohol you can get a product like Goo Gone or another adhesive remover.
Denatured alcohol is cheap, and often crafters and painters already have it on hand.
How To Remove HTV From Hard Surfaces Using a Solvent
Removing HTV from hard surfaces isn’t as easy as removing it from fabric, but it can be done.
- Use the tweezers to begin pulling up the very edges of your HTV design. Work slowly to try to pull it off in larger chunks rather than tiny bits.
- If you’re removing HTV from glass or ceramic be careful to not gouge or scrape the surface with the tweezers.
- As you pull the HTV off it will leave behind a lot of sticky adhesives.
- Put a little denatured alcohol on a clean cloth and rub it on the adhesive. The denatured alcohol will dissolve the adhesives and clean them away leaving you with a clean surface.
You can use a different type of adhesive dissolver if you’d like. Goo Gone, WD-40, and even isopropyl alcohol are other good options.
Always do this step in a well-ventilated area.
How To Remove HTV From Hard Surfaces Using Heat (and a Solvent)
If you can’t get a corner of your design to lift you can add a little heat to loosen the adhesive on the HTV so you can begin to lift it away.
Use a hair dryer or heat gun to heat an edge of the vinyl for no longer than about 20 seconds and then use the tweezers to lift.
Caution: If you apply heat too long to glass you run the risk of cracking or shattering it. This includes car windows, house windows, glassware, and mirrors.
Never apply the heat longer than about 20 seconds. Less if you can get it warm enough to begin removing the HTV.
Once you get the HTV peeled off you can use a solvent like denatured alcohol, isopropyl alcohol, Goo Gone, or WD-40 to help you wipe away the adhesive.
Only use solvents in a well-ventilated area. Breathing them can be harmful to your health.
How To Remove Cricut Vinyl From a Wall

Wall stickers are so much fun to put up, but inevitably they need to be taken down.
They go out of style or start to look ragged and it’s time for them to go.
Be aware that if your wall decals are made from permanent HTV there may be damage to the paint and possibly the wall texture when you pull them off.
So, don’t be disappointed if you have to do a little touch-up to make the wall look like new.
- Use a nylon scraper or tweezers to begin lifting a corner of the wall decal.
- Move slowly and keep the vinyl moving as parallel to the wall as possible rather than pulling out and away. This will help you remove it as a single piece rather than tons of tiny shreds.
- If the vinyl won’t budge use a hair dryer to heat up the vinyl a bit and loosen the adhesive so you can pull it away.
- After the lettering is gone use an alcohol-based adhesive remover to clean the wall.
Good options for removing the adhesive are denatured alcohol and isopropyl alcohol.
We don’t recommend using anything that’s oil-based because it will leave behind a residue and be hard to repaint.
Keep in mind that if the wall paint is flat you’ll end up rubbing some of it off when you clean the adhesive away.
The more gloss in the wall paint the more it can stand up to the rigors of cleaning.
How To Remove Cricut Vinyl From a Car (Paint or Window)
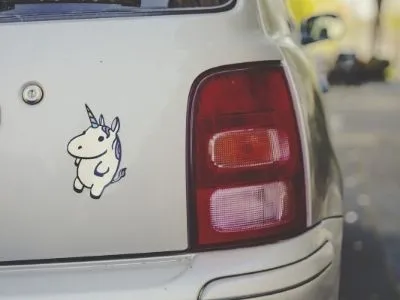
Removing Cricut HTV from a car is easy. If it’s on the paint or plastic (like Cricut car decals) then heat the decal beginning from one edge and carefully pull the HTV away.
Be careful to not overheat the paint, but it can take a lot more heat than the car windows.
If the decal is on the window you can also use heat to help release it but you need to make sure you don’t overheat the glass and crack your window.
- When using heat on a decal stuck to a window, “kiss” the decal with the heat gun or hair dryer and get it just hot enough to begin lifting.
- Lift as much of the decal as you can without heat. Once it’s stuck again and not budging, use a little heat to get it started again.
- Keep the heating sessions to less than 20 seconds (preferably much less) to avoid damaging your window.
Use an alcohol-based cleaner to get the sticky residue off of the window or car paint.
How To Remove Cricut Vinyl From Wood

You can remove Cricut vinyl from wood, but your level of success will depend on how the wood was treated and the type of vinyl used.
- If the wood was sealed you can use tweezers to pull off the vinyl and then clean the surface with an alcohol-based cleaner.
- If the vinyl is removable, this task will be easy with little to no residue or damage.
- If the vinyl is permanent, this task will be difficult and the wood may need to be sanded and restained or repainted to look good again.
If you know you’re going to reuse a piece of wood (stained or painted) always seal it first.
You can use something as simple as Mod Podge to make a clear finish to place the HTV on.
This sealant will make it much easier to remove the HTV later.
If you know you’ll want to remove it later, use removable vinyl to get a damage-free surface when you’re done with your HTV design.
How To Remove Cricut Vinyl From a Chalkboard
What makes HTV removal from a chalkboard so hard is that certain solvents will ruin the surface of the chalkboard so that it’s hard to write on again.
So be careful what you use.
There is no guarantee that you can get HTV off of a chalkboard without causing damage.
If you suspect you may want to remove HTV later, always use removable HTV so you won’t waste the chalkboard.
- Use a hair dryer or heat gun to get a little bit of the edge of the vinyl design to lift.
- Use tweezers to get a grip on it and pull as parallel to the chalkboard surface as you can to keep the vinyl in one piece.
- Once all the vinyl is removed, prepare a cleaner to get rid of any sticky residue. Mix 1/2 cup of white vinegar in 1 gallon of warm water in a clean bucket. (A clean bucket is important because old cleaning residues can ruin the chalkboard surface.)
- Use a clean cloth to wipe down the chalkboard, paying special attention to sticky areas. Use a separate clean cloth to dry excess water.
- Allow the chalkboard to air dry.
You’ll need to season the chalkboard before you can use it again.
If you plan to apply a new HTV design then don’t season the board until you’re done applying the new HTV.
Here’s how to season the chalkboard so that it will be easy to write on again and have a smooth writing surface.
- Use the long side of a piece of chalk and rub it in long strokes across the entire surface of the chalkboard.
- Once the entire chalkboard is coated with an even layer of chalk, use a chalkboard eraser or (preferably) a microfiber cloth to dust away the excess chalk.
This process seems odd, but if you skip it you’ll have a rough time writing on that squeaky clean chalkboard and it won’t fully erase. It leaves “ghosts.” Boo!
Wrapping Up
It’s nice to know that your Cricut designs will last a super long time, and with the right care, they will last as long as you need.
However, it’s also nice to know that you can get them off when you’re done and still reuse your stuff for new crafts!