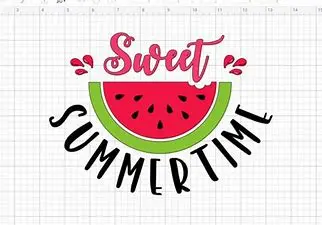
Do you want to know how to curve an image in Cricut Design Space? In this blog post, we’ll walk you through the process step-by-step.
We’ll also provide some tips and tricks to help you create beautiful curved images.
How to Curve an Image in Cricut Design Space

In general, the curve tool is used to curve text near or around an image in Design Space.
However, there are times you may want to curve an image or increase the existing curve on an image.
- Open Cricut Design Space and upload the image you want to curve.
- Select the “Curve” tool from the left menu.
- Click on the slider bar that pops up for the image and drag it to create the curve you want. The more you drag the slider, the more pronounced the curve will be on your text or image.
- Click “Apply” when you’re happy with your design.
Read More: What is Kerned Fonts in Cricut? We cover kerning in this guide and how you can use it for your projects!
Why is Cricut Design Space Used?
Cricut Design Space is a free online platform that allows you to design and upload images for cutting with your Cricut machine.
You can also use Cricut Design Space to create printable projects like invitations, banners, and labels.
One of the great things about Cricut Design Space is that it’s straightforward.
Even if you’ve never used a cutting machine before, you should be able to figure out how to use Cricut Design Space with ease.
Another reason why Cricut Design Space is so popular is that it offers a wide range of features and tools.
For example, in Cricut Design Space, you can:
- Resize images
- Edit images
- Trace images
- Create text
- Weld text and shapes together
- Upload your images
And much more!
In this blog post, we’ll focus on one particular feature in Cricut Design Space: How to curve an image.
Curving an image is a great way to add interest to your Cricut Joy projects. It’s also a great way to make sure that all the elements in your design are cohesive.
Read our related article on How to Uninstall Cricut Design Space From Mac & PC! Whether you no longer need Design Space or want to uninstall and reinstall the program, here are the steps!
How to Curve an Image in Cricut Design Space Step-by-Step

Here are the basic steps:
- Open Cricut Design Space and upload the image you want to curve.
- Select the “Curve” tool from the left menu.
- Click on the image and drag it to create a curved line.
- The longer you drag, the more pronounced the curve will be.
Now let’s take a closer look at each of these steps to know how to curve an image in the Cricut design space.
Step One:
Open Cricut Design Space.
Step Two:
Click on the “Upload” button in the left-hand panel.
Step Three:
Select the image you want to upload to Cricut Design Space from your computer.
Step Four:
Click on the “Curve” tool in the top toolbar.
Step Five:
Use your mouse to click and drag around the edge of the image. As you do this, you will see a white line appear. This is called a path.
Step Six:
Once you have created a path around the entire image, release your mouse button.
Step Seven:
A dialog box appears asking you how much you want to curve the image. Use your mouse to click and drag the slider to adjust the amount of the curve.
Step Eight:
When you are happy with the amount of curve, click on the “Apply” button.
Step Nine:
Your image is now curved! You can continue editing it or save it and use it in your project.
Read More: Cricut Design Weld vs Attach. We explore the differences between these tools and how to apply them to your Cricut designs!
Tips and Tricks

Whether you’re a beginner or have been using Cricut for a while, you may find yourself wondering how to curve an image in Design Space.
It’s a pretty simple process, but a few things to keep in mind to get the best results.
Here are some tips and tricks on how to curve an image in Cricut Design Space!
- When you first open Design Space, the interface is divided into three sections: the toolbar on the left, the editing space in the middle, and the layers panel on the right.
- To begin, select your image from the toolbar and insert it into the editing space.
- Now that your image is inserted, you can click and drag it to reposition it within the editing space. If you want to resize your image, you can click on the “Size” tab in the toolbar and enter new dimensions.
- To curve your image, click on the “Edit” tab in the toolbar and select “Curve.” You will see a dotted line appear around your image.
- Click and drag the endpoints of the dotted line to curve your image. You can also use the control points in the middle of the line to adjust how sharply or gradually your image is curved.
- When you’re happy with how your image looks, click “Apply” in the top right corner of the screen.
We love using curved text and graphics to make unique designs for Cricut car decals, custom tee shirts, aprons, home decor signs, and other Cricut projects.
Curved text is very popular for wedding date signs and similar mementos.
Read More: How Do I Resize an Image in Cricut Design Space? Here are the steps to resize and helpful tips and tricks!
FAQs
Q: How Can I Make My Images More Unique in Cricut Design Space?
A: To make your images more unique in Cricut Design Space, use the “Contour” tool to curve them.
- To use this tool, click on the “Contour” tool, located in the top toolbar.
- Next, click on the “Edit” button in the Contour menu.
- Finally, use your mouse to click and drag the nodes around the image until satisfied.
Read More: How to Use Contour in Cricut Design Space. Learn more about the Contour tool in this guide!
Another way to make your images more unique in Cricut Design Space is to use different colors for each layer.
For example, one layer could be black and white, and another could be colorized.
- To do this, first select the image you want to colorize.
- Then, click on the “Edit” button in the Layers panel.
- Next, click on the “Fill” drop-down menu and select “Color.”
- Finally, use your mouse to click and drag the colors around until you are satisfied with how they look.
Q: What’s the Best Way To Curve an Image in Cricut Design Space?
A: There are a few ways to curve an image in Cricut Design Space, but we think the best way is to use the “Curve” tool.
This tool is located in the “Edit” menu and allows you to manually curve your images by dragging control points along the edge of the image.
You can also use the “Constrain Angle” slider to set how much curvature you want.
Q: How Can I Make My Images Stand Out in Cricut Design Space?
A: Curving your images can give them a professional look and add pizazz to your designs!
- First, open Cricut Design Space and upload the image you want to use.
- Then select the “Text” tool and click on the “Curve” option.
- A box pops up asking you how much you want to curve your text. You can play around with the slider until you find a setting; click “Apply.”
Remember that if you don’t like the changes you make to your design you can always hit the “undo” button to back up to the last step that you liked.
Read More: How Do I Use Pattern Fill in Cricut Design Space? Pattern fill is simple to use – here’s how to do it!
Wrapping UP
Overall, curving an image in Cricut Design Space is a relatively simple process that you can complete in just a few steps.
By following the instructions above, you should be able to successfully curve any image in Cricut Design Space without any problems.
What are your favorite design projects that use the curve tool? Let us know in the comments below. We all love to get new inspiration!
