Resizing in Design Space is another essential tool that you should know about if you regularly use a Cricut machine.
In this tutorial, we’ll show you how to resize an image in Cricut Design Space using the Trace tool and the Freehand tool.
Let’s dive in!
When You Should Resize an image

There are a few reasons why you might want to resize an image in Cricut Design Space.
One reason is that you may want to use a smaller image for a project.
Making images Smaller or Larger
For example, if you’re making a business card, you may want to use a small image that will fit on the front of your Cricut business cards.
Another reason is that you may want to use a larger image.
For example, if you’re making a banner with Cricut, you may want to use a large image that will be the focus of the banner.
Change Sizes of Multiple Components
You can also do this to change the sizes of different components of a project to help them fit together better.
For example, when making a personalized Cricut water bottle you might want a pattern of different-sized hearts, and resizing can help with this!
Read More: How Do I Use Pattern Fill in Cricut Design Space? Here’s how to use Pattern Fill for your projects!
Changing Aspect Ratio
Finally, you may want to resize an image because you want to change the aspect ratio.
For example, if you want to make an image taller or wider, you can do so by changing the aspect ratio.
Being able to change these images can allow you to create more unique and personalized Cricut cutter projects.
You can resize by using the Trace Tool or Freehand methods.
resizing using the trace tool
The best way to resize an image in Cricut Design Space is to use the Trace tool.
The Trace tool is located in the top toolbar and looks like a pencil icon.
- To use the Trace tool, first, select the image you want to resize.
- Then, click on the Trace tool and a new window will open.
- In this new window, you can select how you want to trace the image. We recommend using the Outline Trace option, as it is the most accurate.
- Once you’ve selected your tracing option, click on the Trace button and your image will be resized!
Here’s a video showing you how to use the Trace tool:
Tips for Using Trace Tool
There are a few things to keep in mind when using the Trace tool.
Use High-Quality Images
First, it’s important to make sure that your image is high quality.
The Trace tool works best with images that are clear and have well-defined lines.
If your image is blurry or has poor line quality, it may not resize correctly.
Use Correct Format
Keep in mind that the Trace tool will only work with images that are in .jpg or .png format.
If your image is in another format, you will need to convert it before using the Trace tool.
Benefits of using the trace tool
- Easy to use and only requires a few clicks to get started.
- Accurate and will resize your image correctly most of the time.
- Works with images in .jpg or .png format.
- Makes it easy to resize and crop your image how you’d like.
resizing using the freehand tool
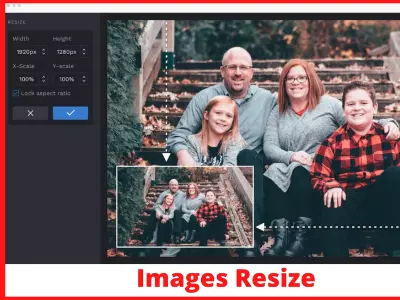
The Freehand Resize tool is another option for resizing images in Cricut Design Space.
This tool is located in the top toolbar and looks like a pair of arrows.
- To use the Freehand Resize tool, first, select the image you want to resize.
- Then, click on the Freehand Resize tool and a new window will open. In this new window, you can select how you want to resize the image.
- You can choose to make the image larger or smaller, or you can change the aspect ratio.
- Once you’ve made your selections, click on the Resize button and your image will be resized!
The Freehand Resize tool is a good option if you want more control over how your image is resized.
However, it’s important to keep in mind that this tool is not always accurate.
If you’re having trouble getting the results you want, we recommend using the Trace tool instead.
benefits of using the freehand tool
- The Freehand Resize tool gives you more control over how your image is resized.
- The Freehand Resize Tool is better for images that aren’t of the best quality, have difficult-to-see lines, or that just need extra attention when resizing.
Problems You Can Face While Resizing an Image
There are a few problems you may face when trying to resize an image in Cricut Design Space.
Difficulty
Trying to freehand your own sizing can be difficult.
This is especially true if you’re not familiar with the software.
Switching between tools and playing around with them can help you to find the best combination for your image.
Loss of Quality
Finally, some images simply cannot be resized without losing quality.
This is often the case with low-resolution images.
If you’re having trouble resizing an image, we recommend trying a different image or using the Trace tool instead of the Freehand Resize tool.
Troubleshooting
If you’re having trouble resizing an image in Cricut Design Space, there are a few things you can try.
- Make sure that your image is high quality and in .jpg or .png format. If your image is in another format, you will need to convert it before using the Trace tool.
- Try using the Trace tool instead of the Freehand Resize tool. The Trace tool is more accurate and will give you better results.
- Contact Cricut Support for help if needed.
Regardless of the reasons why you would want to resize an image, it’s important to choose the right tool for the job.
Conclusion
We hope that this article helped you to learn more about how to resize an image in Cricut!
Be sure to try these tips when resizing your next project.