Do you want to learn how to make banners with Cricut?
If so, you’ve come to the right place! In this blog post, we will teach you how to make beautiful and professional-looking banners using your Cricut machine.
How To Make Banners With Cricut

One of the easiest types of banners to make is to cut or purchase triangle pennants, then cut letters or images from Cricut vinyl and use the adhesive to stick them to the pennants before stringing them together.
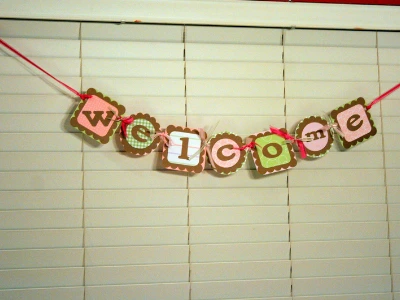
Cut creative shapes for the base of the banner with decorative cardstock, then cut letters to spell your message from coordinating cardstock and glue them to the base before stringing the pieces together.
Short banners can be cut from a single roll of Cricut vinyl and then placed carefully on a cardstock background.
Fabric banners can be made by sublimating Cricut Infusible Ink onto the fabric using the Cricut to cut letters or shapes from Infusible Ink transfer sheets to sublimate the ink into the fabric with the heat press.
What Material Should I Use for My Banner?
The great thing about using your Cricut to make a banner is that it can cut just about any type of material you can find.
This means that you can easily create mixed media banners with one machine.
Some favorites are glitter cardstock, kraft paper cardstock, neon cardstock, and plain cardstock covered with fabric to look like a fabric bunting (but sturdy).
Consider making fabric buntings or banners using Cricut Infusible Ink sheets to “print” the message onto fabric or even thick paper.
Read More: How to Use Cricut Glitter Iron On Vinyl. Here’s how to apply glitter iron-ons to your projects for a sparkly flare!
How Should I Shape My Banner?
First, decide on the basic shape of your banner. Most banners are made in a bunting design or a pennant banner. Pennants can be in various shapes, they don’t only have to be triangles.
For example, you can cut a series of baby bottles, diapers, and teddy bears for a baby shower bunting. You can cut stars, flags, and eagles for an Independence Day bunting.
A lovely Christmas banner we made was a series of large and small circles, 5-point stars, and snowflakes cut from glitter cardstock that we used to decorate a banquet hall.
We put a message in the middle by pasting contrasting velvet paper letters on large double-point banner cutouts.
These types of banners are ideal because they can be as large as you need them to be without needing reams of continuous paper to make them.
Plus, buntings and pennant banners are much better than informative solid banners. They’re extra festive and cheerful, they hang nicely, and flutter beautifully in the wind.
Read More: How Do I Resize an Image in Cricut Design Space? We make it easy to resize your images in this guide!
How To Cut a Banner With Cricut
Using a Cricut machine or other cutting tool, you can easily cut out triangles, circles, stars, rectangles, or other shapes from the poster board.
One of the easiest types of banners to make is to cut or purchase triangle pennants, then cut letters or images from Cricut vinyl and use the adhesive to stick them to the pennants before stringing them together.
The size of your banner will depend on a few factors, including the amount of space you have available and the number of letters in your message.
A good rule of thumb is to allow for about 1 square foot of space per letter.
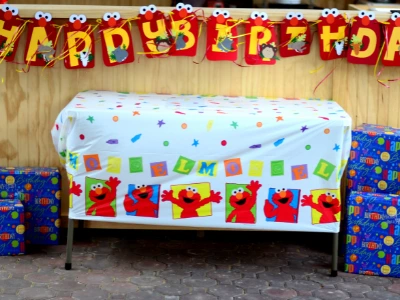
So, if you’re making a banner that says “Happy Birthday,” you’ll need a design area that is at least 4 square feet.
Make sure that any letters or images you cut will fit on the background pieces you’ve cut for your banner.
Once you have determined the size of your design, simply open up Cricut Design Space and adjust the Cricut canvas size to your desired dimensions.
Then, you can start creating your custom banner!
Once your design is loaded into the Cricut, feed in the material you’re cutting with the cutting mat, and set the Cricut free to cut your banner pieces.
Read More: How to Slice Letters in Cricut Design Space. Get started with slicing using our beginner’s guide!
Assemble Your Cricut Banner
You’ll need a large area to assemble your banner. Start by laying out all of your pieces exactly the way you want it to look.
This will help you see if you’re missing something that you need to cut on the Cricut.
Assemble the pieces and add embellishments as desired. Then use a stapler or brads to attach each piece to a ribbon or string to make the banner.
If using string to assemble the banner, paperclips or mini clothespins work well for a more casual style.
Use Cricut Infusible Ink To Make a Banner
The easiest way to make a single-sheet banner with a Cricut is to use a long precut fabric banner and Cricut Infusible Ink sheets, markers, and pens.
Infusible Ink sheets can be cut to any shape desired in the Cricut.
The design is then placed face-down on the fabric and heat applied to the back of the transfer sheet vaporizes the ink into the fabric.
The result is a banner that looks as if it’s been professionally “printed” on fabric, which can be a very nice look though it is time-consuming.
Wrapping Up
These techniques will work for making nice banners even if you have a different cutting machine that isn’t a Cricut!
Really you can use these techniques to make a banner with scissors, even cutting the Infusible Ink sheets with scissors, but it takes longer and the results aren’t as crisp and clean.
The beauty of the Cricut is that the results look professional every time, and the time it takes to design and cut is a flash compared to creating all the pieces by hand.
We hope this post has helped steer you in the right direction for your next banner and inspired you to think of creative ways to make the next banner you cut with Cricut a work of art!