If you’re searching for a fun and easy guide on how to make magnets with Cricut Explore Air 2, then you’ll love this article.
With your Cricut Explore Air 2 machine, you can easily create custom magnets in any shape or size that you want.
All you need is some magnetic vinyl and a few minutes of time.
Let’s get you started on how to make magnets with Cricut.
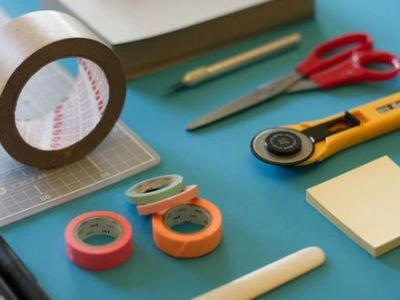
Supplies Needed

When it comes to figuring out how to make magnets with Cricut Explore Air 2, you need to start with what materials you need.
Here is a list of supplies that you will need to get started:
- Some strong permanent adhesive vinyl in the color(s) of your choice. Not sure about the difference between removable and permanent vinyl? Read this.
- A cutting mat
- Scissors or a craft knife (for weeding out the unwanted parts of your design)
- A clean, lint-free surface on which to apply your magnets (a plate or some wax paper works well)
- Transfer tape (Using transfer tape is optional but helpful, particularly if your design is intricate or detailed)
With these supplies on hand, you’re ready to start making magnets!
How to Make Magnets With Cricut Explore Air 2
- Design your magnet using whatever software you’re comfortable with – Cricut Design Space is a popular choice.
- Load your magnetic vinyl into your machine. If you’re using adhesive vinyl, be sure to load that into your machine as well.
- Use the design software to create your custom magnet design.
- Once your design is complete, simply cut it out and weed away the excess vinyl.
- Now, you’ll need to apply your magnets to your desired surface. If you’re using adhesive vinyl, be sure to peel away the backing before applying your magnet to your surface.
Once all of your magnets are in place, enjoy.
Can I Make Disney Magnets With My Cricut Explore Air 2?
Let’s look at how to make Disney magnets. It’s the same as any other magnet design, so that makes things easy!
These are great for gifts, Disney lovers, or souvenirs. Disney is a well-loved brand and a great start to making themed magnets!
For this project, you’ll need:
- Cricut Explore Air 2
- Magnetic vinyl
- Transfer tape
- Scissors
- Disney images
Here’s how to make Disney magnets:
- Once you have all of your supplies, the first thing you’ll need to do is upload the Disney images you want to use onto your Cricut Design Space.
- Once they’re uploaded, resize the image to the size you want, and then cut them out of the magnetic vinyl.
- After they’re cut out, use the transfer tape to apply them to your chosen surface. You now have your very own DIY Disney magnets.
It’s very simple to do and you can do this process with ANY type of character, theme, or design!
Read More: Best Cricut Projects. If you’re new to the Cricut machine then take a look at these awesome projects you can make with them!
Can The Cricut Maker Cut Magnet Sheets And Magnets?
Cricut machines can indeed cut magnet sheets and magnets.
However, there are a few things to keep in mind when cutting these materials.
Be sure to follow the tips below, but here’s a video tutorial showing how to make magnets with Cricut Explore Air 2:
First, it’s important to use a strong grip mat when cutting magnet sheets or magnets.
The strength of the grip mat will help to keep the sheets in place while they’re being cut.
Additionally, it’s important to use a blade that’s designed for cutting thicker materials.
Using the wrong blade can damage the machine or result in poor-quality cuts.
With those tips in mind, cutting magnet sheets and magnets with a Cricut machine is a breeze!
magnet Ideas
Cricut magnets are a fun and easy way to add a personal touch to your refrigerator, locker, or any other metal surface. They also make great gifts.
Here are some ideas to get you started:
Personalized Magnet
Use photos to create a personalized magnet.
Print out a favorite photo and use it as the base for your design. Then, add embellishments with your Cricut machine.
Quote Magnet
Create a quote magnet. Think of your favorite motivational quote or saying and design it onto a magnet.
This is a great way to decorate your workspace or remind yourself of an important message.
Memorable Magnet
Make a memorable magnet.
Use your Cricut Explore 2 to design a custom magnet for a special occasion, like a wedding or graduation.
This is a great way to commemorate a special event and create a keepsake that will last for years.
Final Thoughts
With Cricut magnets, the possibilities are endless. Get creative and have fun!
We hope that we helped you figure out how to make magnets with Cricut Explore Air 2!