Is It Too Hard? Check out This How to Make a Stencil with Silhouette Cameo Guide
How do you create amazing artwork on wood (wood sings)?
It’s simple just follow my How to make a Stencil with Silhouette guide.
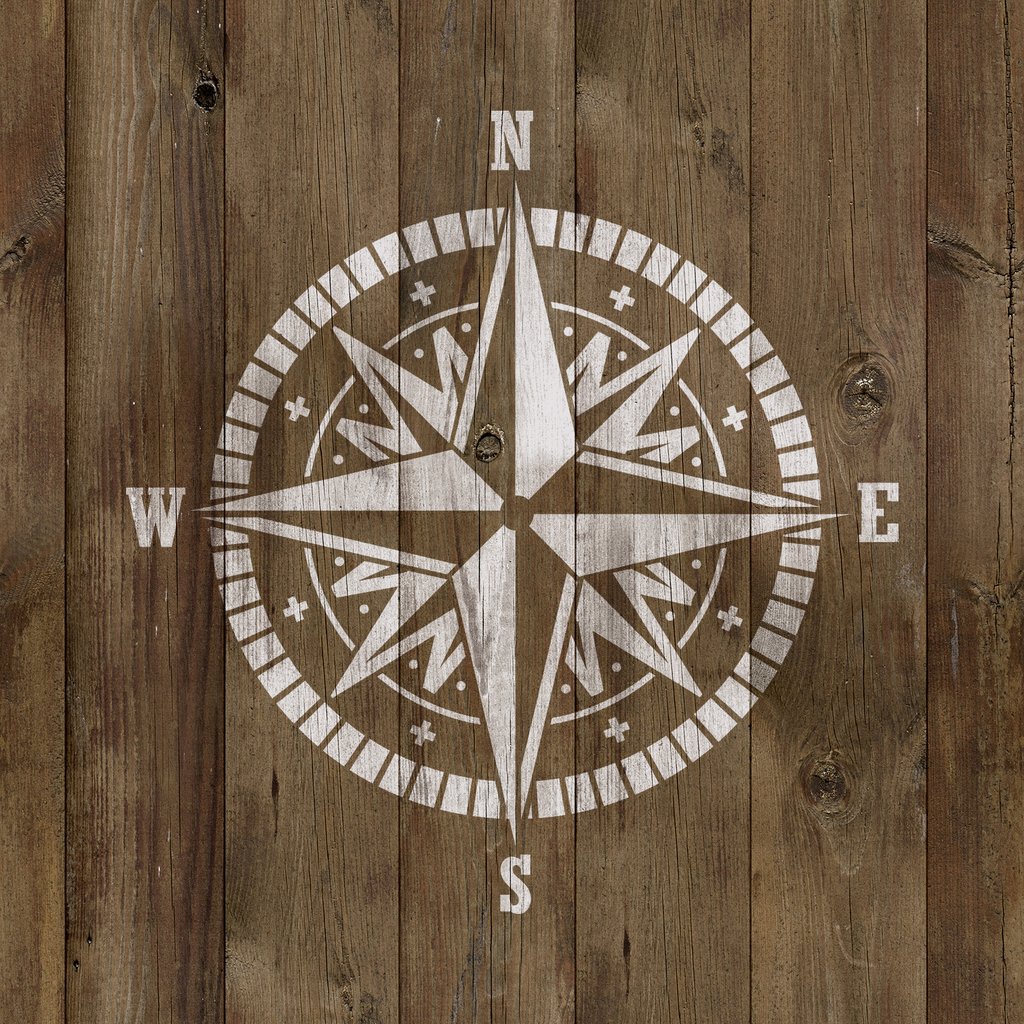
The problem with wood signs is that not many machines can work with it. So this is why stencils were invented, no transfer tape required. You can create breathtaking artwork and sell it for a high price. If you have a Silhouette Cameo then you are in luck because with the Silhouette software you can create stencils with ease.
Now before I get started with sharing the strategies, you need to make a decision. This sounded way too serious than it had to be.
What kind of stencil do you want to make?
One time use only or a reusable one. Best of all you don’t have to use any transfer tape either.
This totally depends on you because only you know if it’s a bulk or an onetime only order. If you are using it for a onetime order, then the paper will be fine. If you want to reuse it over and over again, then you need to look for some suitable plastic. Here’s some good news you can create stencils out of any font and shape.
If you don’t mind paying you can buy some ready made stencil fonts and shapes. When it comes to me, I like to save money wherever I can so I’ve learned how to create stencil fonts and designs. It’s easy. In just a matter of minutes, you can learn it too.
Here’s the problem with some designs and fonts if you cut them out some parts might fall out. For example, if we look at the letter “o”, the middle would fall out with a simple cut, and it wouldn’t look good as a stencil.
So all you have to do is add some support (or bridge) to it. All you have to do is cut in the exterior part of the letter ”o” so it‘s connected to the frame. That’s about it. This is the easiest way to do it. The same goes for designs and shapes. You need to connect the interior part with the frame.
Here’s a heads up. If you have a delicate or extremely complicated design, then it might not worth creating a stencil out of it. You see when fine lines are running left, and right it would take far too much time to get it done. Here are the two ways you can use the Silhouette Cameo software to create stencil ready fonts and designs.
First Way of Doing It
The first tool I would recommend is the knife tool. All you have to do is cut into the letter, so it joins with the exterior. Here’s a frequent question that I get a lot. How many connections (bridges) do I have to make, so the design comes out good?
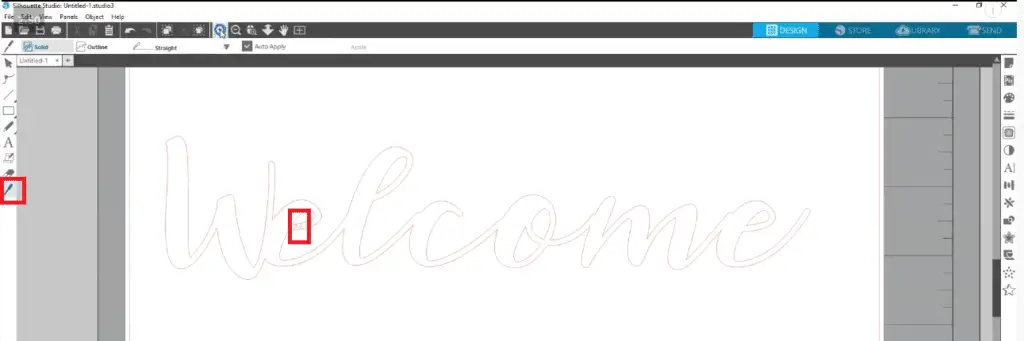
There’s no exact number you need to do as much as it takes. First of all, you need to look at how the design looks. You have to weigh the aesthetics with the functionality. Maybe you can get away with just one bridge. For security reasons, I usually use 2, and it’s not uncommon for me to use four bridges if the design allows it.
Second Way of Doing It
The second tool that you can use in Silhouette Software is the Rectangle tool. Yes, I’ve learned this not long ago. Learning is an ongoing process. It is so simple and elegant. It’s much easier to create the bridge with the rectangle tool than with the knife tool. After you have drawn the rectangle use the subtract option. You’re done. Was it easy or what? Sometimes I use the rectangle because it’s more elegant. For some reason, it’s hard for me to draw parallel lines with a mouse.
Before you get started, I forgot to mention one thing when it comes to fonts. Select the font you want to use and adjust the font size.
 After that, check how the letters are aligned. Are they touching sufficiently? They should be connected as if they would be hand-drawn. If not no biggie there’s a solution for that as well. There are cases where the overlap is too much.
Luckily in the Silhouette Software, you can easily adjust the letter spacing. You either need to move them closer together or further apart. Only after this step, you should start the bridging operations.
Hot Tips
I have another hot tip for you: if you want to make reusable stencils, you need to use plastic. Another benefit of plastic is that you can easily wash any paint so it will remain neat and tidy after numerous operations.
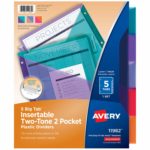 My favorite plastic for reusable stencils is the Letter index divider. This is a cheap and great material. Plus it comes in different colors. Now before you can create the stencil out of the divider, you need to trim it down a bit, you can use a knife or a scissor to cut out the holes. Then if you are using a smaller stencil than you can cut it down to size or use the Cameo to do it.
I really love these dividers because they are light and flexible and easy to wash. They stick easily to the cutting mat. You can un-stick them with ease as well. To lower your costs do clean your cutting mat regularly.
When it comes to stenciling, everybody has their own way of doing things. Some people prefer spraying, and some people prefer brushing. Every job has its benefit. I prefer to use the spraying method because it’s faster. But I need to take extra precautions, so the paint doesn’t end up under the stencil, or the piece will turn out ugly.
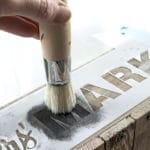 There are different brushes to use to create stencils. One of the best ones I’ve seen was a rounded one; it almost looks like a stamping tool or shaving brush.
So if you want to stencil on wood, then you need to create a stencil with the Cameo. If you know for sure that you will reuse the stencil a few times than it’s a good idea to create it from plastic.
Paper is doable, but after a while, it might get wet from the paint and start leaching left and right.
My last hot tip is this: use tape to fix the stencil on the material you are working on. If the stencil stays in place you have an easier time creating the art piece.
Any type of tape will do. I usually use the one that is next to me. It might be masking tape it works perfectly well.
I’m about to conclude my article about how to stencil with Silhouette Cameo. I’ve shared all my best-kept secrets. As you can see, it is quite easy to create designs which are stencil ready. All you need is a bit of practice, and you can be rolling in a few days.
Closing Thoughts
This is how How to make a Stencil with Silhouette Cameo. If you have any comments or questions, feel free to contact me. I always read the emails and comments.
Until the next article, Happy Crafting.
Frequent questions from our readers (FAQ):
How do I make a stencil with my Silhouette Cameo?
First of all, you need to load up the Silhouette Studio Software. After that, you need to decide if you are doing letter stencils or shapes. The next step is to weld the objects together. If it’s the case build bridges so the inside doesn’t fall out. The final step is to cut it out with the Silhouette Cameo.
Read More: Cricut Design Weld vs Attach. We cover the differences between these two tools and how to use them for your Cricut projects!
Can you make your own stencils?
Yes, you can. For that, you need design software like the Silhouette Studio Software and a vinyl cutter like Silhouette or Cricut.
Can you reuse vinyl stencils?
This depends on the complexity of your design. If you’re only using simple letters or shapes then it will be easy to reuse it. On the other hand, if you are using more complex images then you have to cut a new stencil for each iteration.
How do you make a stencil?
Creating stencil materials is easy to make after you understand that you shouldn’t leave islands. You need to bridge them to the outside. After that, you need to use design software to create the design you want. The final step is to cut out the stencil you have created with the help of a vinyl cutting machine.
Can you make stencils with a Cricut?
Yes you can. Load up Cricut Design Space. Create the shape or letters. Bridge all islands and then let Cricut do it’s thing and cut your creation out.