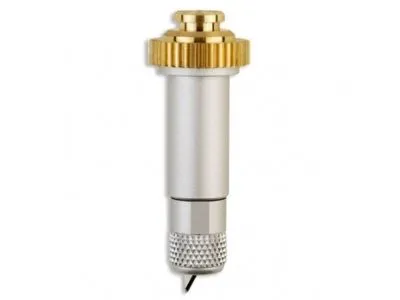
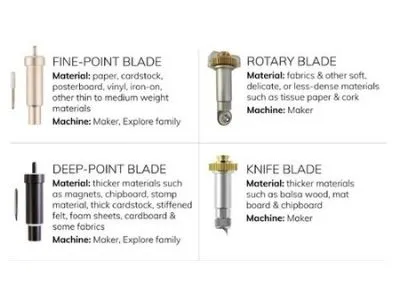
Do you have a Cricut machine? If so, then you know how important it is to keep the blades in good condition.
A dull blade can cause a lot of problems when cutting materials, and it can also lead to frustration.
In this blog post, we will show you how to change a Cricut blade in a few simple steps!
Read our related article on How Long Do Cricut Blades Last? Learn more in this short guide to blades!
How To Change a Cricut Blade

If you have a Cricut Quickswap blade, simply push the button at the top of the housing to pop the old blade off the housing.
Align the flat sides of the new blade tip with the flat insides of the housing, push it on and release the button.
Other Cricut blades are changed by inserting a new blade inside the housing. Open the clamp to release the housing and pull up to remove it.
Push the button on the top of the housing to release and remove the blade.
Carefully pull the old blade out and discard it safely. Remove the plastic cover from the new blade and insert it with the cone end going up into the housing.
A magnet will align the blade and hold it.
Replace the blade housing into the clamp until it is aligned flush with the top of the clamp, then close the clamp to hold the housing with the new blade in place.
How To Change a Cricut Knife Blade

The knife blade is a tiny razor that is extremely sharp.
To help prevent injury, use the changing cap provided by Cricut to loosen and replace the knife blade so you don’t cut yourself.
- Remove the drive housing from the machine and locate the changing cap that comes with the knife blade in the replacement kit.
- Put the changing cap on the knife blade end and twist counterclockwise until the entire sleeve is removed from the drive housing.
- Once it’s loose, the knife blade will drop out. We suggest dropping it straight into the garbage so you don’t lose it or have to pick it up with bare fingers later.
- Remove the new knife blade from its packaging and align the groove on the blade with the groove on the drive housing. Insert the new knife blade.
- Put the changing cap and sleeve over the new blade and twist clockwise to tighten it carefully.
- Remove the changing cap and insert the drive housing with the new blade into the Cricut.
Read More: How to Make Magnets with Cricut Maker. Learn how to make magnets in this easy-to-follow guide!
How To Change a Cricut Rotary Blade

Rotary blades are very sharp and include a changing cap and screwdriver in the replacement kit so you can safely replace the blade and keep crafting.
- Install the included changing cap over the rotary blade.
- Use the included screwdriver to loosen the rotary tip from the blade housing.
- Remove the screw and retain it to secure the new blade.
- Remove the changing cap. The old blade and hardware will remain in the cap so you can discard it all without getting cut.
- The new blade is inside a changing cap. Place the changing cap with the new blade over the blade housing and make sure it’s tight so the screw holes will line up.
- Insert the retained screw into the new blade and tighten it to hand-tight with the provided screwdriver.
- Roll the blade across a cutting mat to make sure it is rolling smoothly. If it’s sticking, back the screw out a bit. If it’s wobbling, tighten it so you’ll get clean cuts.
- Reinsert the blade housing into clamp B, and you’re ready to go!
To see this blade swap in action, check out the Cricut Help video below:
Wrapping Up
We love Cricut because their designs make it so easy to make fun projects with a professional finish.
The brilliant design doesn’t stop with creativity. The machines and blades are so easy to use.
Cricut has always made it simple and safe to swap blades for projects or change blades to keep cuts clean and beautiful.
When your cuts start looking ragged or uneven, you know it’s time to change the blade.
