Do you know how to clean Cricut Maker without damaging it? Read on to discover how easy it can be!
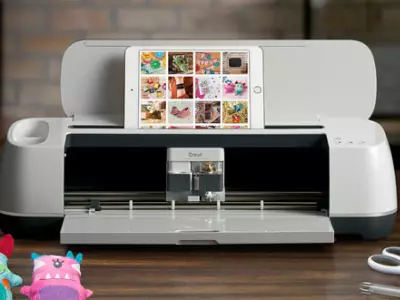
Cricut makers are a popular craft tool that many crafters use to create unique projects and designs.
It’s important to clean your Cricut maker regularly in order to keep it working properly.
We’ll outline some of the best practices for cleaning your Cricut maker. We’ll also include some tips for preventing damage and debris build-up over time.
How To Clean a Cricut Maker
Unplug your Cricut Maker before cleaning.
This helps decrease the risk of damaging your machine and also lets you clean around buttons without worrying about turning it on.
- Use a damp cloth to wipe down the exterior of the machine. Wring your cloth out thoroughly or use a baby wipe. Keep moisture away from buttons and the inside of the machine.
- Use a fine-tip vacuum tool or canned air to clean dust, paper, fabric, and wood debris from around the rollers. Carefully remove the blades and clean around the blade housing and blade tip.
- Use rubbing alcohol or isopropyl alcohol and a cotton swab to clean off greasy or sticky residue from anywhere on the machine.
- Clean Cricut mat in warm, soapy water. Use a scraper to remove stuck-on debris. A little isopropyl alcohol applied with a cotton swab will help loosen adhesives.
Roll the cutting mat with a lint remover to get any residual hair or lint off of the surface before using it again. Allow the entire machine to fully dry before plugging it back in.
These cleaning steps can be used for any type of cutting machine including the Cricut machines, Brother machines, and clean Silhouette Cameo machines.
7 Smart Tips To Clean Your Cricut Maker
To clean the exterior of your Cricut Maker, follow these simple steps:
1. Remove Dust and Debris
Start by removing any dust or debris with a dry cloth.
Use a tack cloth or lint-free microfiber cloth to fully remove dust without leaving behind any moisture or residue.
You can fully wipe off the outside of the machine, but be careful with wiping the inside. Attacking the interior dust with a cloth can cause it to glob up in hard-to-reach places.
It’s better to vacuum it out or blow it away while it’s still fluffy and easy to move.
2. Use Canned Air
Use canned air to spray loose dust from the inside of the cutter.
Pay careful attention to the rollers and tray areas. The compressed air sweeps away debris without making it stick together.
3. Use a Vacuum
If you have a vacuum with detailing attachments for your car you can use it on your cutting machine to help get debris out of the nooks and crannies.
4. Wipe the Exterior
Wipe down the exterior with a slightly damp cloth or a baby wipe.
5. Don’t Forget Rubbing Alcohol
If there are sticky spots anywhere on the machine, inside or out, get rid of them with isopropyl or rubbing alcohol – never water.
The alcohol is a wonderful solvent that quickly cleans away grime and then evaporates away leaving no residue.
6. Clean Regularly
Clean often if you craft often. Make it a habit to use canned air to clean around the rollers every time you cut dusty materials like cardstock or fabric.
This keeps it from building up and slowing down your machine.
7. Use a Dust Cover
Cover your machine every time you finish.
This will cut way down on the buildup of household dust that can often be a little sticky or greasy, especially in the kitchen and dining areas.
Maintaining your Cricut Maker is much easier than fixing it when it’s stuck or having to buy a new one because the old one was avoidably worn out.
4 Common Mistakes To Avoid
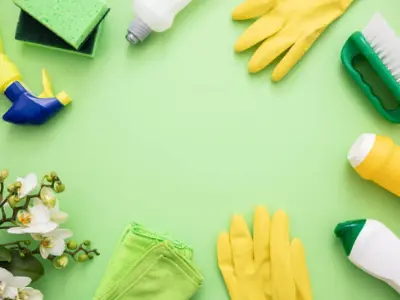
Cleaning the Cricut Maker is very easy. Most of the time it just needs a thorough dusting.
Using complicated cleaners won’t do anything but ruin the finish and possibly decrease the lifespan of your machine.
- Do not use harsh chemicals or abrasive materials on the exterior or interior surfaces of your Cricut Maker, as these can damage the machine.
- Do not submerge your Cricut Maker in water or get water anywhere on your machine. If you want to wipe it down with a damp cloth, make sure to wring out as much water as possible.
- Be sure to unplug your Cricut Maker and make sure that it is turned off before beginning to clean it.
- Make sure that your Cricut Maker is completely dry before plugging it in and using it again.
If you’re diligent about keeping dust off of your machine and cleaning up as you go you should never have a need to do any kind of deep cleaning.
Cleaning Cricut mat is a different case. You’ll need to give these a periodic deep cleaning and possibly restick the mat to keep using it.
Read our related article on how to Restick a Cricut Mat so that it works like new!
And don’t forget to check out this awesome video showing how to clean and maintain your Cricut Machine:
What if I Don’t Clean My Cricut Maker Regularly?
Not cleaning your Cricut Maker regularly can result in a decreased lifespan for your machine. It can also lead to premature wear and tear.
- A build-up of dust, lint, and fibers can cause your Cricut Maker to overheat, which can damage sensitive components.
- Debris can accumulate in the blade housing and cause the blades to dull more quickly or even become damaged.
With regular cleaning, you can help ensure that your Cricut Maker will last for years to come!
Using a Cricut for projects like stickers will cause a faster buildup of adhesive on the blade and rollers.
Keep alcohol wipes handy to clean up these sticky spots before they can get piled with dust.
Wrapping Up
If you love your cutting machine like we do, you’ll want to keep it in top shape so you can keep using it for many years to come. It’s quick and easy to do if you keep up with it.