Whether you’re a seasoned crafter or a first-time maker, you’ll love using your Cricut Maker.
You can make all kinds of projects for your loved ones, friends, and yourself.
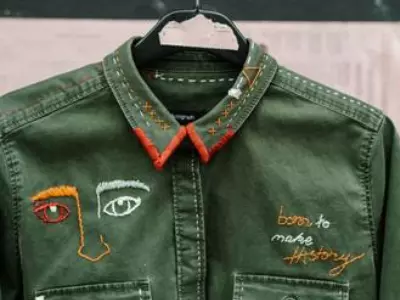
While it’s true that you cannot create clothing with the software, you can make outstanding embroidery projects by having your Cricut machine start your embroidery pattern.
Here are some tips on how to embroider with Cricut Maker.
How To Embroider With Cricut Maker

Cricut makers can do a lot of things and small embroidery jobs are one of them.
Here are a few steps to follow in order to embroider with your Cricut Maker.
Making The Embroidery Pattern
- Download your SVG and upload it to Cricut Design Space
- Adjust the size accordingly to fit your embroidery hoop
- Cut your fabric to size and place the fabric on a Cricut mat. Be sure it’s tacky enough.
- Set the design to draw
- Draw your embroidery pattern onto the fabric using the machine and its pen. Make sure it’s centered and ready to go.
- Remove the fabric piece once the design is drawn on
Read More: How Do I Use Pattern Fill in Cricut Design Space? Follow these easy steps to conquer Pattern Fill!
Sewing The Embroidery
For this part, it’s important to note that a Cricut maker isn’t a sewing machine so this part has to be done with a different machine or by hand.
- Place the fabric piece into your embroidery hoop
- Thread your needle with DMC embroidery thread or something similar
- Follow your design using the appropriate thread types and colors to create your design
- The Cricut pen should come off soon after sewing so the lines will not be there in the final design
After completing these steps you should have a good understanding of how a Cricut maker can help you with your embroidery project.
Tips on Embroidering

Make Your Designs Easy To Embroider
The most challenging part of using a Cricut Maker is making your embroidery patterns easy to embroider.
You want to make sure that the designs are simple and easy to replicate.
Making sure that you choose a design that fits inside your machine comfortably.
You also want to ensure that the design is something you can sew over easily.
Get Familiar With The Software
You will want to get familiar with the software before beginning your first project.
With so many options on the software, you may feel a little overwhelmed.
The best thing to do is to read through the manual. You want to understand how to use the software.
Even after reading the manual, you may want to watch a few Youtube videos on using the software.
This way, you will better understand how the software works.
Here’s a video showing how to embroider with the Cricut machine:
Use The Basic Features
The essential features of the software include a grid, guides, and a design area.
Each of these features comes in handy when you are creating designs.
These features are made to make your life while designing much easier.
Use these features to your full advantage when creating your embroidery patterns.
Use A Tacky Mat
You’ll need to put your fabric down on a Cricut mat, but you want to make sure it’s cleaned and tacky enough to hold the fabric.
Keeping the fabric pulled still and steadily ensures an even draw.
Use A Brayer
When putting your fabric on the Cricut mat it’s best to use a brayer.
What is a Cricut brayer used for?
A brayer will help to flatten out the fabric as best as possible to the mat.
This makes for a better project and an easier method of getting it as flat as possible.
Get creative with your Cricut Maker

Learning how to use your Cricut maker to embroider is a skill in itself, but once you get the hang of it you’ll be able to make anything.
There are tons of different embroidery designs that you can do as well as other cricut machine projects to choose from as well using the Cricut machine.
Bottom line
The Cricut Maker is a tool that can be used for many things including embroidery.
Next time you’re looking to embroider something, let your Cricut do the work to make intricate designs.
