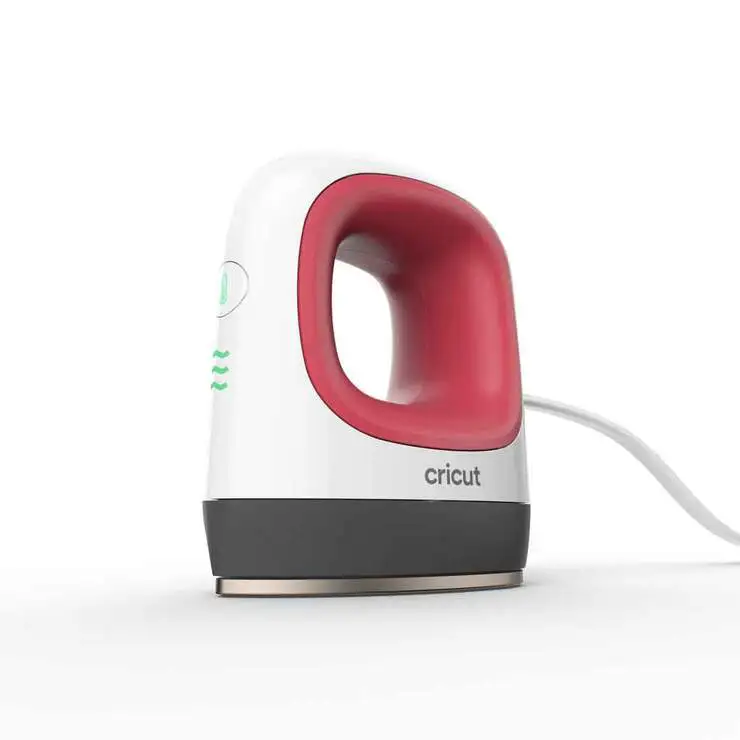
Do you know how to use Cricut EasyPress Mini?
If you’re looking for an easy way to press your vinyl projects, the Cricut EasyPress Mini is a great option!
This small, handheld press is perfect for shirts, tote bags, and other small projects. This article will teach you how to use Cricut EasyPress Mini!
How to Use Cricut EasyPress Mini – The Basics
The Cricut EasyPress Mini is so easy to use.
- Place it on a flat, solid, heat-proof surface.
- Push the button on the front. It will light up red as the unit heats up.
The Mini has 3 guaranteed heat settings (they won’t fluctuate) and edge-to-edge even heating.
- Press the timer for the desired heat setting. The green light indicates it’s working.
Allow your design to cool before removing transfer paper so you’re sure you’ve achieved full adhesion.
Cricut EasyPress Mini Features

- Size: The Cricut EasyPress Mini is a small, handheld press that measures six inches by seven inches. Perfect for small projects where the regular EasyPress is too bulky.
- Portability: This press is perfect for taking on the go! It weighs just two pounds and has a built-in handle for easy transport.
- Heating Element: The ceramic-coated plate heats up quickly and evenly, which is ideal for pressing vinyl projects.
- Safety Features: The Cricut EasyPress Mini features an automatic shut-off function and a cool-touch base, making it safe.
The EasyPress Mini just might be your new favorite too after you try it with some smaller projects.
It’s easier to keep the heat right on your small designs and away from your work surface.
Read More: Cricut Heat Press or Iron? If you have a household iron, should you buy a heat press? We cover how irons and heat presses work for iron-on projects in this guide!
How to Use Cricut Easypress Mini Step-by-Step

What You Will Need
First, gather your supplies.
For this project, you will need:
- Cricut EasyPress Mini
- Vinyl
- Tote bag or another small project (This wine bag project is better with the Mini!)
- Ironing board
- Pressing cloth (optional)
Now that you have gathered your supplies, it is time to learn how to use Cricut EasyPress Mini! This process is simple and only requires a few steps.
Follow the instructions below to learn how to use this handy little press.
Step One:
Preheat your EasyPress Mini.
To do this, simply press the power button on the front of the press. The LED light will turn red, indicating that the press is preheating.
Step Two:
While your EasyPress Mini is preheating, prepare your project.
If you use vinyl, make sure that your design is cut out and weeded.
If you are pressing a shirt or other garment, make sure it is clean and free of wrinkles.
Step Three:
Once your EasyPress Mini has finished preheating it’s time to start pressing!
Place your vinyl (or garment) onto your ironing board.
Place the EasyPressMini on top of the design, ensuring that the heating element touches the vinyl (or garment).
Step Four:
Press the button on the top of the EasyPress Mini to start the timer. The LED light will turn green, indicating that the press is working.
Depending on the vinyl you are using, you will need to press for 15-30 seconds.
Step Five:
When the timer goes off, remove your project from the ironing board and let it cool.
That’s it! You have now successfully pressed your project using the Cricut EasyPress Mini!
Cricut Easypress Mini Tips and Tricks

Like me, you love finding new ways to use your Cricut EasyPress Mini!
This little machine is so versatile and easy to use that it’s quickly become one of my favorite tools.
I especially love to use it on projects that would normally disappear under the bigger Cricut EasyPress which is just a bit big to use confidently with really small designs.
But even though it’s easy to use, you need to know a few things to get perfect results every time.
This section of the blog post will share how to use Cricut EasyPress Mini tips and tricks for using the Cricut EasyPress Mini.
- It gets hot fast! The plates heat up in just seconds, so it’s essential to be careful when handling them. I always recommend using an oven mitt or a heat-resistant glove to avoid burns.
- Make sure your surface is flat before you start pressing. If your surface isn’t flat, then the EasyPress Mini won’t be able to distribute the heat evenly, and you’ll end up with uneven results. I like to use a cutting board or a piece of plywood to press on because they’re both flat and sturdy.
- Finally, when you’ve finished pressing, let your project cool completely before removing it from the plate. If you try to remove it too soon, you might end up ruining all your hard work!
If you follow these simple tips, you’ll be able to get perfect results every time you use your Cricut EasyPress Mini.
FAQs
Q: How Do I Set Up My Cricut Easypress Mini?
A: To set up your Cricut EasyPress Mini, start by unboxing the machine and taking everything out.
- Next, find a flat, heat-resistant surface to work on.
- Place the mini base on this surface, ensuring that the silicone pad is facing up.
- Then, plug in the power cord and turn on the machine by pressing the ON button.
- The LED light will turn green when it’s ready to use.
- Finally, select your desired time and temperature using the plus and minus buttons.
Press the START button to begin heating the plate.
Q: How Do I Clean My Cricut EasyPress Mini?
A: To clean your Cricut EasyPress Mini, start by unplugging the machine and letting it cool down completely.
Use a damp cloth to wipe down the machine’s exterior.
Be careful not to get water on or inside the machine. If there are stubborn spots, you can use a mild soap and a non-abrasive sponge.
Dry the plate with a towel before using the press.
Q: How Big Is the Cricut Easypress Mini?
A: The Cricut EasyPress Mini is 6 inches by 7 inches, making it the perfect size for smaller projects, like Cricut patches.
It’s also lightweight and portable, so you can take it wherever you go.
Q: What Materials Can I Use With the Cricut Easypress Mini?
A: The Cricut EasyPress Mini can be used on various materials, including paper, vinyl, fabric, and cardstock.
Wrapping Up
We love to use our EasyPress Mini for fun small projects like dog tee shirts, ornaments, small bunting banners, and doll clothing, but the ideas for this handy little tool are endless!
What’s your favorite project for the EasyPress Mini? Let us know in the comments below!

